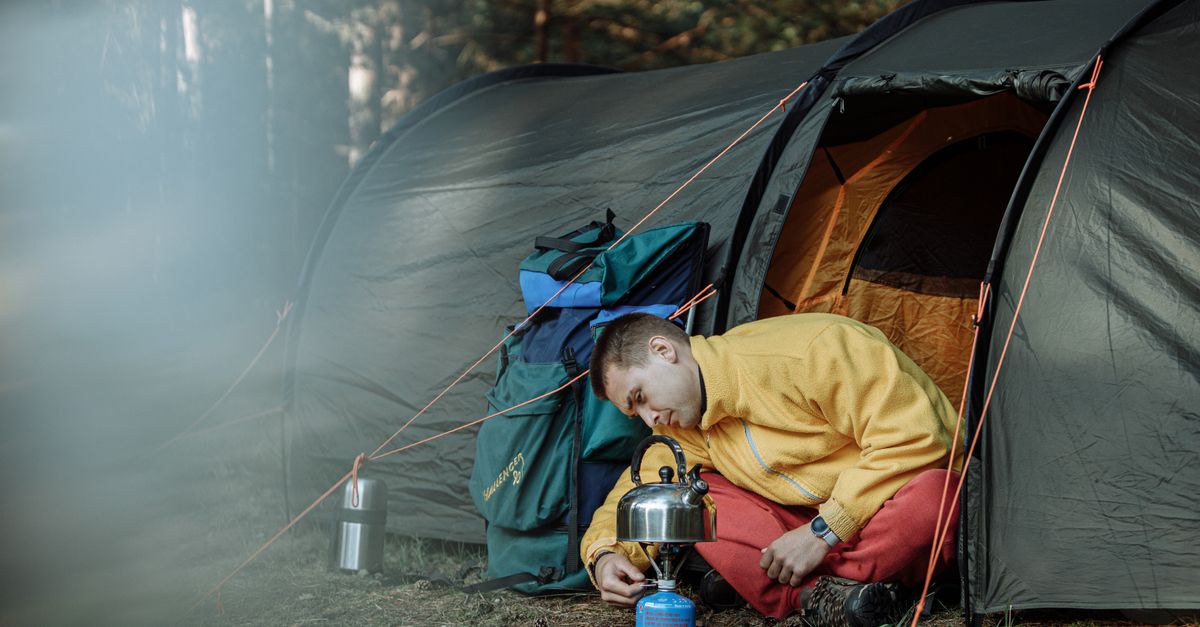
Why Most Budget Camping Gear Fails (And The 'Smart Splurge' Strategy That Actually Works)
As someone who’s spent countless nights under the stars, from the humid forests of the Pacific Northwest to the chilly deserts of the Southwest, I’ve learned a painful truth: cheap camping gear is almost always a false economy. I vividly remember my first backpacking trip with friends, eager to save a few bucks. I bought the cheapest tent, sleeping bag, and hiking boots I could find. That night, a surprise downpour turned my ‘waterproof’ tent into a leaky sieve, my sleeping bag offered no warmth, and my feet were a symphony of blisters. I was miserable, wet, and thoroughly discouraged. That trip taught me a crucial lesson: your gear isn’t just equipment; it’s your lifeline to comfort, safety, and enjoyment in the outdoors.
Most beginners, myself included, fall into the trap of thinking all camping gear is created equal, or that ‘good enough’ will suffice. The reality is, while you don’t need to mortgage your house for top-tier brands, blindly opting for the cheapest items often leads to discomfort, compromised safety, and ultimately, a ruined experience. This article isn’t about shaming budget shoppers; it’s about equipping you with the knowledge to make smart splurges – identifying the critical items where quality truly matters and where cutting corners will cost you more than just money.
Key Takeaways
- Budget camping gear often fails due to inferior materials, poor construction, and inadequate design, leading to discomfort and safety risks.
- The ‘Smart Splurge’ strategy focuses on investing in foundational gear categories like shelter, sleep system, and footwear where quality is non-negotiable.
- Prioritize durability, weather protection, and comfort for core items, as these directly impact your outdoor experience and safety.
- Save money on less critical items or those easily DIY’d, but never compromise on essentials that protect you from the elements.
The True Cost of ‘Cheap’ Gear: Beyond the Price Tag
The allure of a low price tag is powerful, especially when you’re just starting out or trying to minimize expenses. But with camping gear, that initial saving often comes with significant hidden costs. In my experience, these costs manifest in three critical areas: performance, durability, and safety.
When I first started, I bought a budget sleeping bag rated for 40°F. I was camping in what I thought would be mild fall weather, but the temperature dropped to the low 30s overnight. I shivered uncontrollably, barely sleeping, and woke up feeling exhausted and borderline hypothermic. The bag’s insulation simply compressed under my weight, losing its loft and thus its insulating properties. It was a miserable night that almost made me give up camping entirely. That experience hammered home the performance gap. Cheap gear often uses lower-quality materials that don’t perform as advertised. A ‘waterproof’ tent might only handle a light drizzle, a ‘warm’ sleeping bag might barely keep you comfortable at room temperature, and ‘supportive’ boots might offer little more than flip-flops on uneven terrain.
Beyond performance, there’s the issue of durability. My budget tent, the one that leaked, also ripped at a seam on its second outing, rendering it practically useless. Cheaper gear is built with shortcuts: thinner fabrics, weaker zippers, poorly stitched seams, and lower-grade components. This means it wears out faster, tears more easily, and breaks down when you need it most. You might save $50 initially, only to replace the item two trips later, ultimately spending more than if you had invested in a quality piece from the start. This cycle of replacement is financially wasteful and environmentally unsound.
Most critically, cheap gear can compromise your safety. Imagine being caught in an unexpected storm with a tent that collapses or leaks, leaving you exposed to the elements. Or hiking miles from civilization in boots that fail, leading to injury. A flimsy headlamp might die when you’re navigating a tricky trail in the dark, or a unreliable water filter could lead to illness. These aren’t just inconveniences; they can be genuinely dangerous situations. The peace of mind that comes from knowing your gear will stand up to the challenge is, in my opinion, priceless. That’s why understanding these hidden costs is the first step towards making smarter choices.
The ‘Smart Splurge’ Philosophy: Where Quality Matters Most
The ‘Smart Splurge’ philosophy isn’t about buying the most expensive gear for every single item. It’s about strategic investment. It recognizes that certain pieces of gear form the foundation of your outdoor experience and directly impact your safety, comfort, and ability to enjoy nature. These are the items where compromising quality is a gamble you don’t want to take. Based on years of trial and error (and a few unpleasant surprises), I’ve identified three core categories where a smart splurge is non-negotiable: your shelter, your sleep system, and your footwear.
1. Your Shelter: The First Line of Defense
Your tent is your home away from home. It protects you from wind, rain, insects, and cold. A cheap tent, as I painfully learned, can turn a beautiful wilderness experience into a nightmare. Here’s why you should splurge on your shelter:
- Weather Protection: Quality tents use durable, truly waterproof fabrics (measured in hydrostatic head ratings), robust seam sealing, and strong, lightweight poles (like aluminum, not fiberglass). This means it will actually keep you dry and stand up to unexpected gusts.
- Durability: Thicker denier fabrics for the fly and floor resist tears and punctures. High-quality zippers won’t snag or break after a few uses. Stronger stitching prevents seams from blowing out in a storm.
- Design & Features: A well-designed tent offers good ventilation to prevent condensation, strategically placed pockets, easy setup, and ample vestibule space for gear storage. These small details make a huge difference in livability and comfort.
My recommendation: Look for brands known for reliability and good warranties. While a $70 ‘family tent’ might seem appealing, a $200-$400 backpacking tent from a reputable brand (like Big Agnes, MSR, or Nemo) will offer vastly superior protection, last for years, and genuinely enhance your trips.
2. Your Sleep System: Rest and Recovery Are Paramount
A good night’s sleep in the outdoors is crucial for recovery, warmth, and morale. Your sleep system comprises your sleeping bag and sleeping pad. This isn’t just about comfort; it’s about preventing hypothermia in colder conditions. Here’s why you should splurge:
- Sleeping Bag (Temperature Rating & Fill): Cheap sleeping bags often have optimistic temperature ratings. A 20°F budget bag might only keep you warm down to 40°F. Quality bags use higher-fill power down (for warmth-to-weight ratio) or advanced synthetic insulations that retain loft even when damp. Always choose a bag with a comfort rating that is appropriate for the lowest temperature you expect, and then some. I always aim for a bag rated 10-15 degrees below my expected low.
- Sleeping Pad (R-Value & Comfort): A sleeping pad is not just for comfort; it’s vital insulation. The ground drains heat rapidly. An R-value indicates how well a pad insulates. Budget pads often have low or no R-value, meaning you’ll lose significant body heat to the ground. Splurge on a pad with an R-value of 3 or higher for 3-season camping. Quality pads also offer better cushioning and packability.
My recommendation: Expect to spend $150-$300 for a reliable 3-season sleeping bag and $100-$200 for a good insulating pad. Brands like Therm-a-Rest, Nemo, and REI Co-op offer excellent options in this range. Don’t skimp here; a cold, sleepless night can ruin an entire trip.
3. Your Footwear: The Foundation of Every Step
Your feet are your most important mode of transport in the wilderness. Protecting them is paramount. Blisters, sprains, or general foot pain can quickly derail any hike, from a short day trip to a multi-day trek. Here’s why quality footwear is essential:
- Support & Protection: Good hiking boots or shoes provide ankle support (especially on uneven terrain), protect your feet from sharp rocks and roots, and offer a stable platform. Cheap shoes often lack proper arch support, cushioning, and structural integrity.
- Traction: Quality outsoles with aggressive lug patterns provide superior grip on wet rocks, muddy trails, and loose scree. This is a critical safety feature that budget shoes often compromise.
- Durability & Waterproofing: High-quality boots use durable leathers or synthetics, reinforced stitching, and proven waterproof membranes (like Gore-Tex) to keep your feet dry and protected. Inferior materials wear out quickly and often fail to keep water out.
- Fit & Comfort: This is perhaps the most personal aspect. Splurging on a proper fitting process at a specialty outdoor store, where experts can assess your gait and foot shape, is invaluable. They can recommend brands and models that suit you best, helping you avoid painful break-in periods and long-term discomfort.
My recommendation: Plan to spend $150-$250 on quality hiking boots or shoes. Brands like Merrell, Salomon, Oboz, and Keen are reliable choices. Remember, good socks (wool or synthetic) are just as important as the boots themselves, so don’t overlook those either.
Where You CAN Save: Smart Budgeting Without Compromise
While the ‘Smart Splurge’ strategy dictates where you should invest, it also highlights areas where you can comfortably save money without significantly impacting your experience or safety. This is where your budget savvy truly shines, allowing you to get outdoors without breaking the bank.
1. Cooking and Eating Utensils
Unless you’re planning gourmet backcountry meals, fancy cooking systems aren’t strictly necessary. You can easily save money here.
- Instead of: A multi-piece titanium cookset for hundreds of dollars.
- Consider: A single lightweight aluminum pot, a spork from your kitchen drawer, and a cheap plastic cup. For stoves, a simple butane canister stove is often less than $20 and perfectly adequate for boiling water or simple meals. You can even try a DIY alcohol stove made from soda cans for ultra-light, ultra-cheap cooking. I still often carry my trusty $15 pocket rocket stove and a single small pot; it’s lightweight and gets the job done every time.
2. Navigation Tools
High-end GPS devices are great, but for most recreational campers, they’re overkill.
- Instead of: A dedicated GPS unit costing $300+.
- Consider: Your smartphone with downloaded offline maps (like AllTrails, Gaia GPS, or Google Maps’ offline feature). Just be sure to carry a portable power bank to keep it charged. A reliable compass and a printed map of your area are also essential backups, and both are relatively inexpensive.
3. Lighting
While a reliable headlamp is crucial, you don’t need the most expensive model.
- Instead of: A $100+ headlamp with multiple beam patterns and a thousand lumens.
- Consider: A basic, reliable headlamp with a few brightness settings for around $20-$30. Supplement this with a small lantern (battery-powered or even a DIY option like a water bottle filled with water and a headlamp strapped to it for diffused light) for campsite ambiance. A quality budget brand like Black Diamond or Petzl offers solid entry-level options.
4. Camp Furniture
Folding chairs and tables add comfort, but they’re entirely optional.
- Instead of: Lightweight, compact, but expensive folding chairs and tables.
- Consider: Sitting on a log, a rock, or directly on the ground. A simple foam sit pad (often $10-$15) can provide surprising comfort and insulation for very little cost. I’ve spent many comfortable evenings perched on a flattened log.
5. Water Bottles and Hydration Reservoirs
High-tech filtration systems and insulated bottles are convenient but not always necessary for day trips or car camping.
- Instead of: Multiple insulated stainless steel bottles and a gravity filter system.
- Consider: Durable plastic Nalgene bottles (often under $15), or simply reusing clean plastic soda bottles. For water filtration, a Sawyer Mini filter (around $20-$25) is incredibly effective, lightweight, and durable – a great example of a budget-friendly item that doesn’t compromise safety.
By being strategic about where you spend and where you save, you can build a functional and reliable camping setup without unnecessary expenditures. The key is to always think about the potential consequences of a piece of gear failing and prioritize accordingly.
Beyond the Gear: Investing in Experience and Knowledge
Even with the best gear, your outdoor experience can be enhanced or hindered by what you know and how you prepare. In my journey, I’ve realized that some of the most valuable ‘splurges’ aren’t on physical items, but on knowledge, skill, and mindset. These are the non-material investments that truly elevate your time in nature.
1. Education and Skills Training
Knowing how to use your gear, read a map, or react to an unexpected situation is often more important than the brand name on your tent.
- Map & Compass Skills: Take a local workshop or watch in-depth tutorials online. The ability to navigate without electronics is a critical safety skill. I once got turned around in a dense forest when my phone died, and my basic map and compass skills were my only way back to the trail.
- First Aid & Wilderness Medicine: Enroll in a wilderness first aid course. Knowing how to treat injuries, identify common ailments, and manage emergencies in remote settings is invaluable. A good first aid kit is essential, but the knowledge to use it effectively is even more so.
- Leave No Trace Principles: Understand and practice these seven principles. They’re about minimizing your impact on the environment and ensuring beautiful places remain beautiful for others. This knowledge costs nothing but provides immense value.
2. Physical Preparation
Even with lightweight gear, hiking can be demanding. Being physically prepared makes a huge difference in enjoyment and reduces injury risk.
- Regular Exercise: Incorporate hiking-specific training into your routine. Focus on leg strength, core stability, and cardiovascular endurance. The more fit you are, the less taxing the trail will be.
- Practice Hikes: Before a big trip, do several shorter hikes with a loaded pack. This helps break in new gear, identify any hot spots in your boots, and get a realistic sense of your pace and endurance.
3. Trip Planning and Research
A poorly planned trip, even with great gear, can quickly go awry.
- Thorough Research: Understand the terrain, elevation changes, water sources, weather patterns, and potential hazards of your destination. Online forums, trail guides, and park rangers are excellent resources. I spend hours on this before any new trip.
- Contingency Planning: Always have a ‘Plan B’ for weather changes, trail closures, or unexpected issues. Share your itinerary with someone reliable, and know your bail-out points.
- Packing Smart: Learn efficient packing techniques to maximize space and distribute weight correctly. This isn’t just about what you bring, but how you bring it.
By investing in these non-material ‘splurges,’ you build confidence, competence, and a deeper appreciation for the outdoors. This knowledge complements your physical gear, creating a truly robust and enjoyable camping experience. It’s the difference between merely having gear and being a capable outdoors person.
My Journey: From Budget Blunders to Smart Splurges
My evolution from a budget-gear-buying novice to a strategic outdoor enthusiast was paved with cold nights, wet sleeping bags, and blistered feet. Each uncomfortable experience was a lesson, slowly shifting my perspective from ‘how cheap can I go?’ to ‘where does quality truly matter for my experience?’
My most significant shift happened after that disastrous leaky tent incident. I was so disheartened, I almost gave up. But a friend, a seasoned backpacker, sat me down and explained the ‘trifecta’ – the tent, sleeping bag, and pad. He let me borrow his old, but still reliable, 3-season tent and a well-insulated sleeping pad for my next trip. The difference was night and day. I stayed warm, dry, and actually slept. That small taste of comfort completely re-ignited my passion for camping. It wasn’t about the specific brands he lent me, but the quality of protection they offered.
From that point on, I started saving specifically for these key items. Instead of buying a new piece of cheap gear every time a new trip came up, I set aside money. My first real splurge was a quality backpacking tent. It cost me nearly $300, which felt like a fortune at the time. But that tent has now been with me for over eight years, through countless rainstorms and windy nights, always keeping me dry and safe. Its zippers still work, its seams are intact, and it sets up in minutes. The per-use cost has been incredibly low, and the peace of mind it provides is immeasurable. Compare that to the two cheap tents I bought and replaced within a year.
My next investment was a proper sleep system: a down sleeping bag with a realistic temperature rating and a high R-value inflatable pad. These were another $400 combined. Again, a significant upfront cost, but these have allowed me to comfortably camp in colder conditions, extending my season and opening up new destinations. No more shivering, no more dreading bedtime. This gear allowed me to enjoy the experience rather than merely endure it.
I still employ a budget-conscious mindset for less critical items. My cooking pot is a simple aluminum one. My compass is a basic $10 model. My dry bags are repurposed garbage bags for many items. But for anything that directly impacts my safety, warmth, or ability to move comfortably through the wilderness, I’ve learned that a smart splurge is an investment in my adventure, not an expense. It’s about building a reliable foundation that allows me to truly connect with nature, rather than battling against my inadequate equipment.
Frequently Asked Questions
Q1: Is it always necessary to buy expensive brands for camping gear?
A1: Not always the most expensive, but it is necessary to buy quality brands for core items. The ‘Smart Splurge’ strategy isn’t about brand snobbery; it’s about prioritizing categories like shelter, sleep systems, and footwear. Reputable mid-range brands often offer excellent value, combining durability and performance without the premium price tag of ultra-light or niche gear. Focus on specifications (e.g., tent hydrostatic head, sleeping bag fill power/R-value, boot construction) over just brand names.
Q2: How can I tell if a piece of budget gear is ‘good enough’ or a false economy?
A2: Research is key. Look for user reviews that specifically mention performance in adverse conditions (rain, wind, cold). Pay attention to complaints about zipper failure, seam leakage, or material durability. Check the specifications: for tents, look at the denier of the fabric and the type of poles; for sleeping bags, look at the fill material and stated temperature ratings (and compare them across brands). Generally, if an item is significantly cheaper than similar products from reputable brands, it’s worth being skeptical.
Q3: What are the absolute minimum items I should splurge on if I’m on a very tight budget?
A3: If you can only choose one or two, prioritize your sleep system (sleeping bag and pad) first, especially if you plan to camp in anything other than warm, dry weather. A cold night can be dangerous and will ruin your trip faster than anything else. Second, invest in quality footwear appropriate for your activity. A cheap tent might leak, but at least you can huddle in your warm bag. But if your feet give out, your entire trip is over.
Q4: Can I buy used gear to save money without compromising quality?
A4: Absolutely! Buying used gear is an excellent way to get quality items at a lower price. Check online marketplaces, outdoor gear consignment shops, or even REI’s ‘Used Gear’ section. For sleeping bags, consider cleaning or re-insulating if possible, or opt for synthetic fill, which is easier to sanitize. Always inspect used tents for rips, broken poles, or compromised waterproofing. Used boots can be tricky due to wear patterns, but a good pair of used hiking shoes might be a steal. It requires more careful inspection, but the savings can be huge.
Q5: What’s the best way to maintain my gear to make it last longer, especially the splurged items?
A5: Proper care significantly extends the life of your gear. Always clean and thoroughly dry your tent, sleeping bag, and pad before storing them. Store sleeping bags loosely in a large mesh bag, not compressed in their stuff sack, to maintain loft. Clean and condition your hiking boots regularly, and replace insoles as needed. Repair small tears or snags promptly with patching kits. Following manufacturer’s care instructions is crucial. Treat your investments well, and they will serve you for many adventures to come.
Written by Sophia Rodriguez
Travel & Leisure, Lifestyle Enrichment
A retired travel writer, Sophia now chronicles the joys of everyday discovery and mindful living.
You Might Also Like

Why Most Beginners Fail at Mastering Photography (And The Intentional Approach That Actually Works)
Struggling with photography? Eleanor Vance explains why common beginner mistakes sabotage progress and shares a proven intentional approach.
Why Most Budget Home Security Fails (And The Layered Defense That Actually Works)
Discover why common budget home security approaches fall short and learn the layered defense strategy that actually protects your home without breaking the bank.

Why Most People Fail at Mastering Their Personal Style (And The Intentional Approach That Actually Works)
Struggling to define your personal style? Eleanor Vance reveals why common advice misses the mark and shares a simple framework that truly works.